How to Make the Best Bread Machine Bread

When you first start out using a bread maker you might want to experiment at bit with different bread maker recipes until you find out how to make the best bread machine bread.

Bread machine bread differs from store-bought bread or oven-made bread in different ways. Bread machine bread tend to be fuller, slightly heavier and more dense in the texture. This might sound negative if you are used to airy, fluffy bread, but once you get the hang of it, you can make wonderful bread machine bread that will satisfy any bread loving person.

What exactly is a bread maker

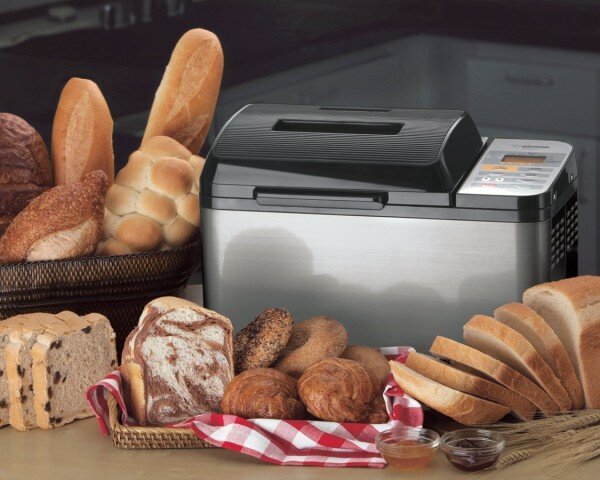
An automatic bread machine is a great tool for someone who likes bread. It allows you to make your own homemade, delicious bread without the usual mess of having to knead the dough by hand.

An automatic bread maker is a machine that mixes the dough, kneads it to perfection and bakes the bread as well – all in one simple process. All you have to do is to measure out the ingredients and add them in the correct order.

There are few steps that you can follow in order to get the best bread machine bread every time. Use these steps as a guideline if you are new to bread making using automatic bread machines.

Get to know your bread maker

This is a really important step as every bread maker is different. Even if you had a bread maker before it might not function in the exact same way as the others. It’s sort of the same as with ovens – not two ovens bake a bread in exactly the same way.

Get to know your bread maker well by reading the manual and understanding the different settings. Then try a simple bread maker recipe on different programs, change the baking time and the crust settings. Compare the bread bakes on different settings and see which one you prefer. Get familiar with the settings of your machine.

Measure out your ingredients 

When following a bread machine recipe it is quite important to be exact when you measure out your ingredients. If the recipe says 2½ cups of flour it means exactly 2½ cups of flour. Adding too little or too much will influence the result and since you don’t get to have your hands in the dough then you might not realize it before it’s too late. So always be exact when you measure out your ingredients.

Adjust the temperature

Also, you have to make sure that the ingredients have more or less the same temperature. This applies mainly to the liquid ingredients like water, oil, eggs etc. If your recipe requires eggs or milk, then you have to take these ingredients out of the fridge before you use them. Take them out of the fridge about ½ hour before in order to make sure they are not too cold.

Add the ingredients in the right order

This is extremely important or you risk that your bread machine bread will turn out as a complete failure. Follow the order of the recipe. Different bread machine brands come with a recipe leaflet and they also claim that you’ll only be able to get good results if you add the ingredients in the right order, even to the level where salt is added before flour. So until you have enough experience to make your own recipes you will probably want to stick with the instructions.

As a general rule, the wet ingredients have to be added first so they are at the bottom of the baking pan. The dry ingredients are added last. This allows the kneading paddles to move freely at first to ensure that all the ingredients are mixed together well before the actual kneading process starts.

Know your settings

As you have already studied the different programs of your bread maker then this step should be fairly easy. It is important that you use the right program according to the type of bread you are baking. Your bread maker will have different programs for example for white bread, wheat bread, whole wheat, gluten free etc. Most bread machines will also allow you to change the settings of the crust to be light, medium or brown according to your preferences.

Bake – clean – store

As the baking cycle has finished, many machines have a keep warm function that allows you to keep the bread nice and warm for usually up to an hour.

After removing the bread from the bread pan, you need to clean the bread pan in order to make sure that it is clean for the next time you need to use it. If there should be any left overs from the bread around the paddles then you remove these with warm water to make sure nothing stays.

Then it’s time to enjoy your fresh bread. Homemade bread tends to dry faster than store bought bread as there is no preservatives inside, so store your bread in a suitable container if you don’t eat it all the same day. Keep in mind that it stays fresh for up to 2-3 days if you store it well.

Zojirushi BB-PAC20 Review

Zojirushi BB-PAC20 bread maker

Here, we have to do with one of the best bread makers on the market right now. The Zojirushi BB-PAC20 bread maker is for people who are really serious about bread making.

With a Zojirushi bread maker you can’t really do wrong. It uses the top technology, and this Japanese brand has a long known history of developing top range kitchen appliances using the best technology available. The Zojirushi BB-PAC20 definitely uses the most advanced technology which ensures you a perfect loaf of bread every time, which both newbies and advanced bakers will feel enthusiastic about.

Click Here for Best Prices on the Zojirushi BB-PAC20

Key features of Zojirushi BB-PAC20

This bread machine makes a 12-pound rectangular loaf. The shape results in a traditionally shaped bread. The heating technology ensures that the bread is baked evenly from all sides. The lid even has a heat element to make sure that the bread is baked from the top as well. There is a window in the lid that allows you to follow the process and make sure it bakes as desired.

This Zojirushi bread maker has a lot of different programs that makes it one of the most versatile bread makers on the market. You can use this bread maker for much more than bread; you can make pizza dough, cake, cookie dough, sour dough starter, jam, yogurt, or even a fresh meat loaf in this machine.

It has a gluten free program that is excellent. You can make gluten free machine bread that has the perfect taste and texture.

It also has a custom “home-made” program that allows you to set the time, weight, color etc. and this is really great if you want to experiment with your own bread machine recipes.

Naturally, it has a timer that allows you to bake with a 13 hour delay. This is really great as it allows you to put in the ingredients in the evening and let the machine bake early morning. You’ll be able to wake up to the smell of freshly baked bread every morning. The good thing is that the machine hardly makes any noise, so you don’t have to worry about waking up the family while baking.

It has dual kneading paddles which ensures a perfectly kneaded dough that is spread evenly in the baking pan. The paddles are easy to attach properly and they stay in the pan as opposed to many other baking machine where the paddles often end up stuck in the loaf instead.

It has a LED-clock that allows you to follow time easily, and this bread maker is actually quite fast as it has a baking cycle of little more than 2 hours.

Pros and cons:

Pros:

  • Perfectly shaped large loaf
  • Very quiet
  • Very versatile
  • Fast
  • Perfect for gluten free machine bread
  • Timer
  • 6-min power failure backup

Cons:

  • Can’t think of any except the price. It’s a bit on the expensive side, but if you are concerned about value for money then you won’t be disappointed.

Best features at a glance:

  • Large 12-pound traditionally shaped loaf
  • 2 high-quality mixing paddles
  • Heating element in the lid
  • 10 pre-programmed settings
  • Large window in the lid
  • Stainless steel design
  • Horizontal design
  • Timer with 13-hour delay
  • Gluten free program
  • Homemade program
  • Quick bake setting
  • Keep warm function (keeps your bread warm for up to 60 minutes after baking)
  • Choice of crust setting (light, dark or medium crust)
  • Battery operated clock in case of power cut
  • LED clock
  • Horizontal
  • Dimensions: 18 x 10.5 x 13 inches ; 22.1 pounds
  • Comes with a measuring cup, a dvd, recipe leaflet and instruction book

Final thoughts:

When I started out baking with a bread machine, I initially started out with one of the cheaper models. That also worked out fine, but the breads always came out funny looking. The texture and taste was fine though, so I didn’t want to replace it just for aesthetic reasons.

However, as I became more experienced and enthusiastic about bread making, I decided to buy a Zojirushi bread machine since they seemed to be a good buy. And I can say that I have never regretted this choice.

One of the reasons that I love my Zojirushi BB-PAC20 is that it is so versatile. You have endless opportunities with this machine.

I bake a lot of gluten free bread as I have a gluten sensitivity myself, but my husband and our children like white, fluffy bread – and this covers all our needs to perfection. However, the gluten free program is so great that I can easily make gluten free bread in the bread maker without any of them noticing the difference.

Another thing that I love is that it is so quiet. You can hardly hear when it is working. This is a big difference from the first bread machine I owned that would wake up the whole house if I started it early morning, which I obviously only did once.

It is also easy to clean, which I love – and the kneading paddles stay in the pan – not in the bread!

All in all, I’d say that the Zojirushi BB-PAC20 is the best bread machine I’ve ever tried and I couldn’t live without it. It is a clear 5 star for me.

Click Here for Best Prices on the Zojirushi BB-PAC20


How to make bread machine pizza dough

You can easily make an excellent pizza dough in your bread maker. It’s actually one of the easiest ways to whip up a quick pizza as it saves you the effort of having the hands in the dough.

When you make bread machine pizza dough it is important to remember the right order of the ingredients so you start by adding the wet ingredients. After that the bread machine takes care of the rest. When you hear the machine beeping – then you know its time for you to take over and finish up a delicious pizza.

Ingredients for bread machine pizza dough:

  • 1 cup of lukewarm water
  • 1 tbsp olive oil
  • 3 cups of all-purpose flour (or 1 cup durum wheat and 2 cups all-purpose)
  • 1 tsp salt
  • 1½ tsp dry yeast

Add the ingredients in the listed order. Start the bread machine on the dough program.

When the dough cycle is finished you remove the dough from the pan and it is ready for your favorite toppings.

This bread machine pizza dough gives an approximately 16-inch round pizza. It should be baked for 20-25 minutes at 475 F.


Gluten Free Bread Machine Recipe

If you have adopted a gluten free diet, you will probably be missing bread every now and then. Using a gluten free bread machine recipe will allow you to enjoy nice, healthy, homemade bread that tastes great.

There can be different reasons for avoiding gluten in your daily diet. A gluten free diet has long been necessary for people suffering from celiac disease but today’s health awareness has proved that many people suffer from gluten sensitivity or intolerance which leads them to feel better when avoiding gluten.

Gluten free bread is still kind of a rarity and can be costly and not always a culinary experience. Baking your own gluten free bread is a good option as it allows you to control the ingredients.

However, it is not always an easy task. Bread without gluten is less fluffy as it is the gluten that makes the bread rise and become airy. So you need to use a proper substitute for gluten when you bake gluten free bread. Adding a sort of starch and/or fibre is a good idea as it adds texture to the bread, and gives it a slightly fluffy feeling. You can use gluten free baking mixed flour, gluten free all-purpose flour, or you can blend your own blend.

You also need to make sure that your bread maker has a program for gluten free bread. You need to be able to adjust the rising time and the baking time accordingly. A non-stick baking pan is to prefer as the batter is different when the dough doesn’t contain gluten.

Once you have these things in place you can start experimenting to find the perfect gluten free bread machine recipe. Below you will find one of my favorite recipes for gluten free bread in the bread maker.

Gluten free bread machine recipe

Wet ingredients:

  • 3 eggs
  • 1/4 cup olive oil (or another type of high-quality cooking oil)
  • 1½ cup of milk
  • 1/4 cup of honey
  • 1 tsp of vinegar

Dry ingredients:

  • 2½ cups of rice flour
  • ½ cup of buckwheat or corn flour
  • 2/3 cups of starch (corn, potato or both)
  • 1 tbsp of dry yeast
  • 1 tsp salt
  • 1 tbsp xanthan gum

Ensure that the milk has room temperature. Add all the ingredients to the bread maker, ensuring that all the wet ingredients are at the bottom.

Start the bread maker on the gluten free program.

After few minutes of kneading you need to check if the texture is right, and perhaps adjust with more flour or liquid.

Bake and enjoy. Let it cool off before slicing.

If you’ve tried this gluten free bread machine recipe you are very welcome to comment and let me know what you think.


How to Find The Best Bread Maker

If you are looking for a new bread maker then you have come to the right place. The first step is to find the right bread machine. But how do you find the best bread maker? This article will help you find out how to select the machine that is just right for you.

There are many things to consider when trying to find the best bread maker. For example, it all depends on the size of your family, the size of your kitchen, how often you bake, which types of bread do you want to make and so on. You can use this article as a check-list with the things you need to ask yourself before you make your choice.

Things to consider when choosing the best bread maker:

  • Budget. First, you need to determine your budget. This will make it easier to buy a bread maker as you can rule out some from the beginning. Bread makers come in a wide variety of prices, from cheap bread machines to the more expensive ones. If you know your budget from the beginning it will be a lot easier to choose. If you are going to bake a loaf every now and then, a cheap version can do it for you, but if you are going to use it daily then you need to look for a model of above $100.
  • Productivity. You need to consider how much bread you use in your household. Do you have a family, do you live alone, how much bread is consumed in your household on a daily basis? It makes a big difference if you are single, or a couple or if you are a family with children. If you bake every day, there are options with more than one loaf at a time, which is recommended for large households. Smaller households will do just fine with a single loaf.
  • Bread size. Again, this depends on the size of your household. You need to choose according to the amount of people in your household and consider how often you want to bake bread. There are different sizes of loafs to choose between, so you can choose according to your needs.
  • Loaf shape. There are different shapes to choose between. You can have loafs that are traditional bread shape, you can have round loafs or square loafs. This depends on your preferences. Most bread makers tend to have slightly square tins, which is the most common, but there are other models available.
  • Bread pan. An important thing to consider is the bread pan. Besides the shape, you need to consider the material and the amount of bread pans as mentioned above. Also, it is a good idea to choose one that is removable so you can take it out to clean it properly.
  • Design. Bread makers come in a variety of designs so this is the time to consider the size of your kitchen. Will you keep it on the table top or will you store it in your cabinet and just take it out when you need it? What amount of space do you have available? And finally, you need to consider the material and the color of preference.
  • Programs and settings. There are bread machines that can be used for many other things than just bread. For example, you can get machines that allow you to make cake, pasta, marmalade or even your own yogurt. The settings will allow you to adjust the baking time, the color of your bread, and different programs will allow you to to bake gluten free machine bread, sour dough bread, jam, noodles, or even just making a dough without baking it.
  • Timer. A timer is useful if you want your bread to be ready at a certain time or if you want to bake while you are not at home. Not all bread machines have timers so this is something you need to consider before you buy a bread maker.
  • Noise. Some models make more noise than others. If you want to bake during the night to have fresh bread early in the morning, then it is important to go for a low-noise model.
  • Reviews. You can learn a lot from reading bread maker reviews. They will tell you a lot of details about the different models and you can learn from other peoples experience. Save your time and read only the bread maker reviews that are relevant for your budget.

After going through this list of things to consider if you are looking for the best bread maker, you should be able to make an informed decision. On this blog you will also find lots of bread maker reviews that can help you further in the process.


Welcome to my blog

Hi there and welcome to my blog. You have probably landed here because you are interested in bread making, right?

Well, then you have come to the right place.

This site has been made by a bread making enthusiast that wants to share this passion with you.

You will find tips and tricks for bread making, you’ll find my best recipes and you’ll find information about bread makers and other helpful products that I have tried and tested.

I hope you’ll stick around for a while and feel free to leave any comment you might have.

Posted on Categories TipsLeave a comment on Welcome to my blog