How To Keep Bread Fresh

When you just start to bake your own bread there is a great chance that there won’t be much left at the end of the day, simply because it is so delicious to serve freshly baked bread.

However, once bread making becomes a natural part of your everyday life, then leftovers might start to appear.

So what do you do with the leftovers?

Some people make the mistake of storing bread in the fridge. However, this is not a good idea as it will strip the bread of moist and leave you with some dry, chewy leftovers after a short time in the fridge.

The best thing you can do is to store your bread in a suitable type of bread storage. The purpose is to keep the bread fresh for as long as possible, but it is also important to protect the bread from possible threats like flies, insects or mice. There are several different options that you can choose between.

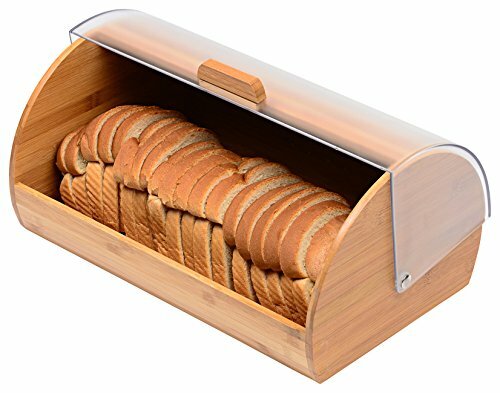
  • Breadbox. A breadbox is a good choice. A breadbox is a storage container that you can use to store bread and other baked goods. It is usually placed on the counter top where you have easy access to bread all day long. It keeps the bread from going stale too fast. The breadbox allows you to store your homemade bread at room temperature which will delay the process of decay. The lid of the breadbox is loose which allows an airflow that reduces condensation. This means that the process of creating mold is delayed. A breadbox is usually made from plastic, but it is also possible to find wooden breadboxes, as well as breadboxes made from metal or pottery.

woodenbreadbox

  • Bread storage container. There are other types of bread storage containers that are made specifically with the purpose of keeping bread fresh for as long as possible. Tupperware or Lock & Lock are good example of airtight bread storage containers. They are good for smaller loaves of bread or just for leftovers.

Bread Storage Container

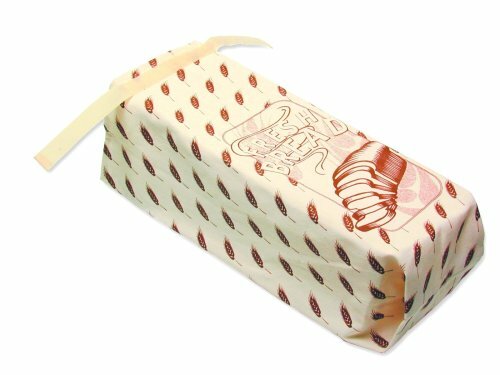
  • Bread Bags. There are many different types of bread bags that can be used to store homemade bread. Plastic bags can be used for breads with a softer crust. If you store a crispy bread with a hard crust in a plastic bag it will go soft really fast. Bread with a hard crust can be stored in a paper bag or a linen bag. Linen bags are good as they can be used again and again and they allow an airflow, where plastic bags can produce condensation.

breadbag

Another good way to keep bread fresh is to freeze it as soon as possible. The faster you freeze the bread the more fresh it will be when you defrost it. You can freeze bread in plastic zip-lock bags or in containers like Tupperware. Let the bread defrost at room temperature and perhaps heat it a little before serving.

How to Make the Best Bread Machine Bread

When you first start out using a bread maker you might want to experiment at bit with different bread maker recipes until you find out how to make the best bread machine bread.

Bread machine bread differs from store-bought bread or oven-made bread in different ways. Bread machine bread tend to be fuller, slightly heavier and more dense in the texture. This might sound negative if you are used to airy, fluffy bread, but once you get the hang of it, you can make wonderful bread machine bread that will satisfy any bread loving person.

What exactly is a bread maker

An automatic bread machine is a great tool for someone who likes bread. It allows you to make your own homemade, delicious bread without the usual mess of having to knead the dough by hand.

An automatic bread maker is a machine that mixes the dough, kneads it to perfection and bakes the bread as well – all in one simple process. All you have to do is to measure out the ingredients and add them in the correct order.

There are few steps that you can follow in order to get the best bread machine bread every time. Use these steps as a guideline if you are new to bread making using automatic bread machines.

Get to know your bread maker

This is a really important step as every bread maker is different. Even if you had a bread maker before it might not function in the exact same way as the others. It’s sort of the same as with ovens – not two ovens bake a bread in exactly the same way.

Get to know your bread maker well by reading the manual and understanding the different settings. Then try a simple bread maker recipe on different programs, change the baking time and the crust settings. Compare the bread bakes on different settings and see which one you prefer. Get familiar with the settings of your machine.

Measure out your ingredients 

When following a bread machine recipe it is quite important to be exact when you measure out your ingredients. If the recipe says 2½ cups of flour it means exactly 2½ cups of flour. Adding too little or too much will influence the result and since you don’t get to have your hands in the dough then you might not realize it before it’s too late. So always be exact when you measure out your ingredients.

Adjust the temperature

Also, you have to make sure that the ingredients have more or less the same temperature. This applies mainly to the liquid ingredients like water, oil, eggs etc. If your recipe requires eggs or milk, then you have to take these ingredients out of the fridge before you use them. Take them out of the fridge about ½ hour before in order to make sure they are not too cold.

Add the ingredients in the right order

This is extremely important or you risk that your bread machine bread will turn out as a complete failure. Follow the order of the recipe. Different bread machine brands come with a recipe leaflet and they also claim that you’ll only be able to get good results if you add the ingredients in the right order, even to the level where salt is added before flour. So until you have enough experience to make your own recipes you will probably want to stick with the instructions.

As a general rule, the wet ingredients have to be added first so they are at the bottom of the baking pan. The dry ingredients are added last. This allows the kneading paddles to move freely at first to ensure that all the ingredients are mixed together well before the actual kneading process starts.

Know your settings

As you have already studied the different programs of your bread maker then this step should be fairly easy. It is important that you use the right program according to the type of bread you are baking. Your bread maker will have different programs for example for white bread, wheat bread, whole wheat, gluten free etc. Most bread machines will also allow you to change the settings of the crust to be light, medium or brown according to your preferences.

Bake – clean – store

As the baking cycle has finished, many machines have a keep warm function that allows you to keep the bread nice and warm for usually up to an hour.

After removing the bread from the bread pan, you need to clean the bread pan in order to make sure that it is clean for the next time you need to use it. If there should be any left overs from the bread around the paddles then you remove these with warm water to make sure nothing stays.

Then it’s time to enjoy your fresh bread. Homemade bread tends to dry faster than store bought bread as there is no preservatives inside, so store your bread in a suitable container if you don’t eat it all the same day. Keep in mind that it stays fresh for up to 2-3 days if you store it well.