Getting your first bread maker can be pretty exiting. Opening the box and unwrapping the machine leaves you time for great anticipation. Setting it up, reading the manual and getting ready – but suddenly you might wonder the most important issue of how to use a bread maker. This article will take you through the different stages of bread making using a bread maker so you will become a pro in no time.
What is an automatic bread maker?
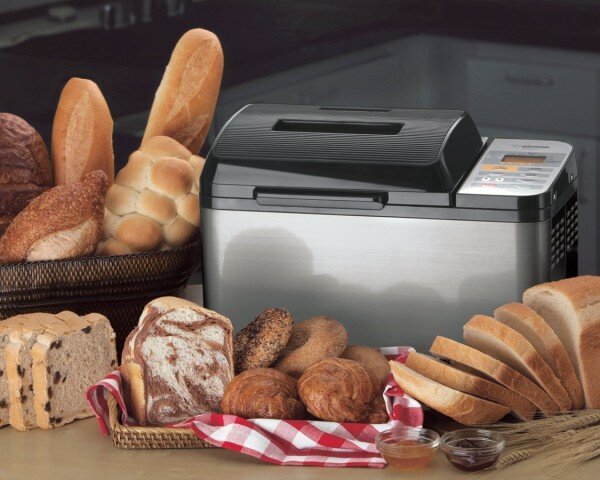
A bread maker is a machine that bakes bread from a-z. It’s an all-in-one baking device that kneads, rises and bakes the bread. All you need to do is to add the ingredients in the right order, and make sure that all settings are correct. The machine will do the rest for you.
The machine consists of a bread pan, that will shape the loaf, usually one or two kneading paddles and a heating element that makes sure that the bread is baked.
How to use a bread maker:
- Get to know your bread maker
Make sure you read the instruction book carefully before you start doing anything else. Read if there are any necessary steps to make before you use it.
Then you can start inspecting it. Take the bread pan out, insert it again, observe how it fits together. Take the kneading paddle out a few times and put it back and see how it reacts.
- Wash the parts that come in contact with the dough. Make sure you rinse it well in order to remove any left overs from the soap.
- Become familiar with the settings. Find out how you adjust the loaf size, the crust settings and the timer.
- Measure out your ingredients. It is important to be quite exact when it comes to the ingredients as the bread will not bake well if you are not exact. It is a good idea to weigh out your ingredients before you start adding them to the bread maker so you have it all ready before you start.
- Control the temperature of the ingredients. It is best if the ingredients have the same temperature. If you use liquids like milk or yogurt then take them out of the fridge about ½ hour before you start adding them to the bread maker to make sure it has the same temperature as the remaining ingredients. This will allow the bread to rise properly. Some machines have a feature where the machine takes care of the temperature, so it starts mixing when all the ingredients have the same temperature. If your machine has this then you don’t need to worry about taking ingredients out of the fridge before adding them.
- Add the ingredients in the right order. As a general rule you add the wet ingredients at the bottom and the dry ingredients last. Be careful especially with the salt and the yeast. The yeast should not touch any of the wet ingredients as this can prevent the bread from rising properly. You can make a little indentation in the flour where you can add the yeast as this will prevent it from touching the liquids when the kneading cycle starts.
- Use the timer. Many bread makers allow you to delay the baking process. This is really useful if you want to have bread ready early in the morning so you can wake up to the smell of fresh bread. Or if you want to bake when you are not at home, then you can set the timer to have the bread ready by the time you’ll be home.
- Choose your program. Most bread makers come with a large variety of programs that allow you to bake many different types of bread. The most common is the basic bread setting that will let you make a classic, white loaf of bread. Many bread makers also allow you to make whole wheat bread, sandwich bread, dough, gluten free bread, cake, jam, pasta dough, low carb bread ect. Many machines also has an express bake program. You also have to adjust the crust control depending on if you want a light crust or a dark crust.
- Press start. If your machine has a feature of temperature control then nothing will happen until the ingredients have reached the same temperature. If your machine doesn’t have this feature then the machine will start mixing the dough.
- Add extras if you want. Many bread machines have an alarm that will notify you when it is time to add extras like seeds, nuts, dried fruits, cheese ect. You can make delicious cakes and sweet breads by adding sweet, dried fruits, nuts and spices.
- Decide if you want to remove the kneading paddles. Some machines allow you to remove the kneading paddles easily and will reshape the bread before baking. Other machines don’t have this option so you have to remove the dough and put it back in to get the right shape before baking. You can leave the kneading paddles in while baking. This will leave holes as you have to remove the paddles from the finished loaf. This will leave marks where the paddles have been. Some machines have technology that doesn’t make this a problem but other machines are designed in a way that they are hard to remove without destroying the bread. So be aware of this and find out how your model works.
- Keep warm function. Most bread makers have a keep warm function that allow you to keep the bread warm for usually up to one hour.
- Remove the bread after the baking cycle is finished. Don’t let the bread cool off inside the bread pan, the best is to remove it just after the baking cycle has finished. This will allow the bread to absorb the moisture properly and to let any excess evaporate. If you leave it too long in the baking pan the moisture will collect at the bottom and this can possibly leave you with a too moist bread.
- Wash all the parts and the machine is ready for the next time. Most parts can be cleaned just using running water and soap. If you prefer to use the dish washer then check first to make sure that the parts are dish washer safe. However, most of the removable parts of often non-stick which is best to clean with a sponge, a bit of soap and some water. Non-stick is usually not good to put in the dish washer as it will slowly tear down the non-stick coating.
- Store the bread. Don’t put your bread in the fridge as it will draw all the moisture out of the bread. Learn how to keep bread fresh and store it in containers, bread boxes or bags.
If you need more guidance you can watch this video for more details.